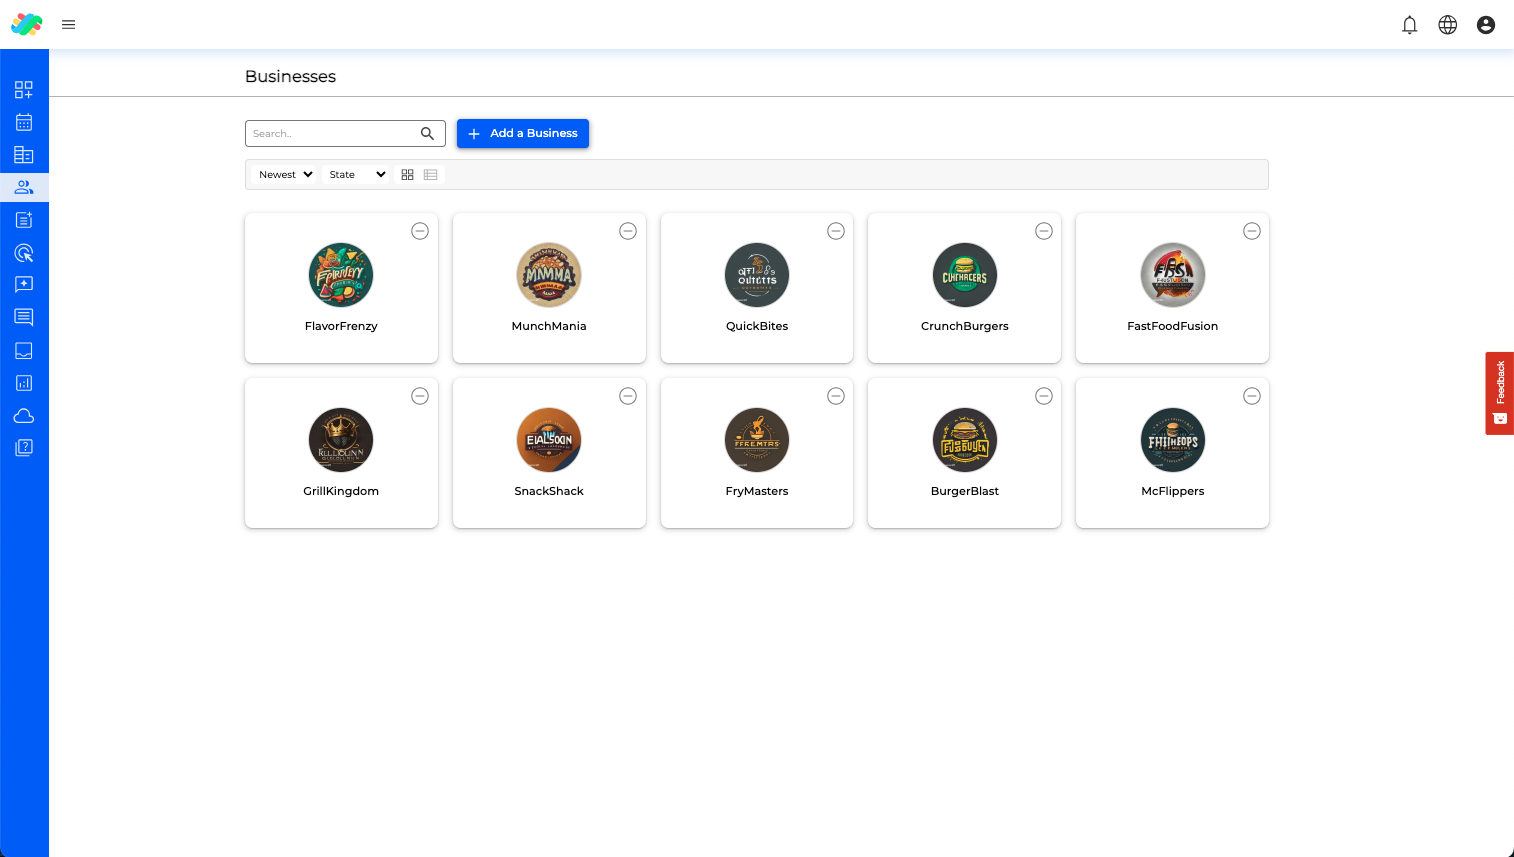
✅ Businesses are brands that operate within the platform. The business section of LikeIT is designed to manage and track all the relevant information for the businesses that the agency works with, and is the one you will link your social media accounts to manage posting, reviews and so on.
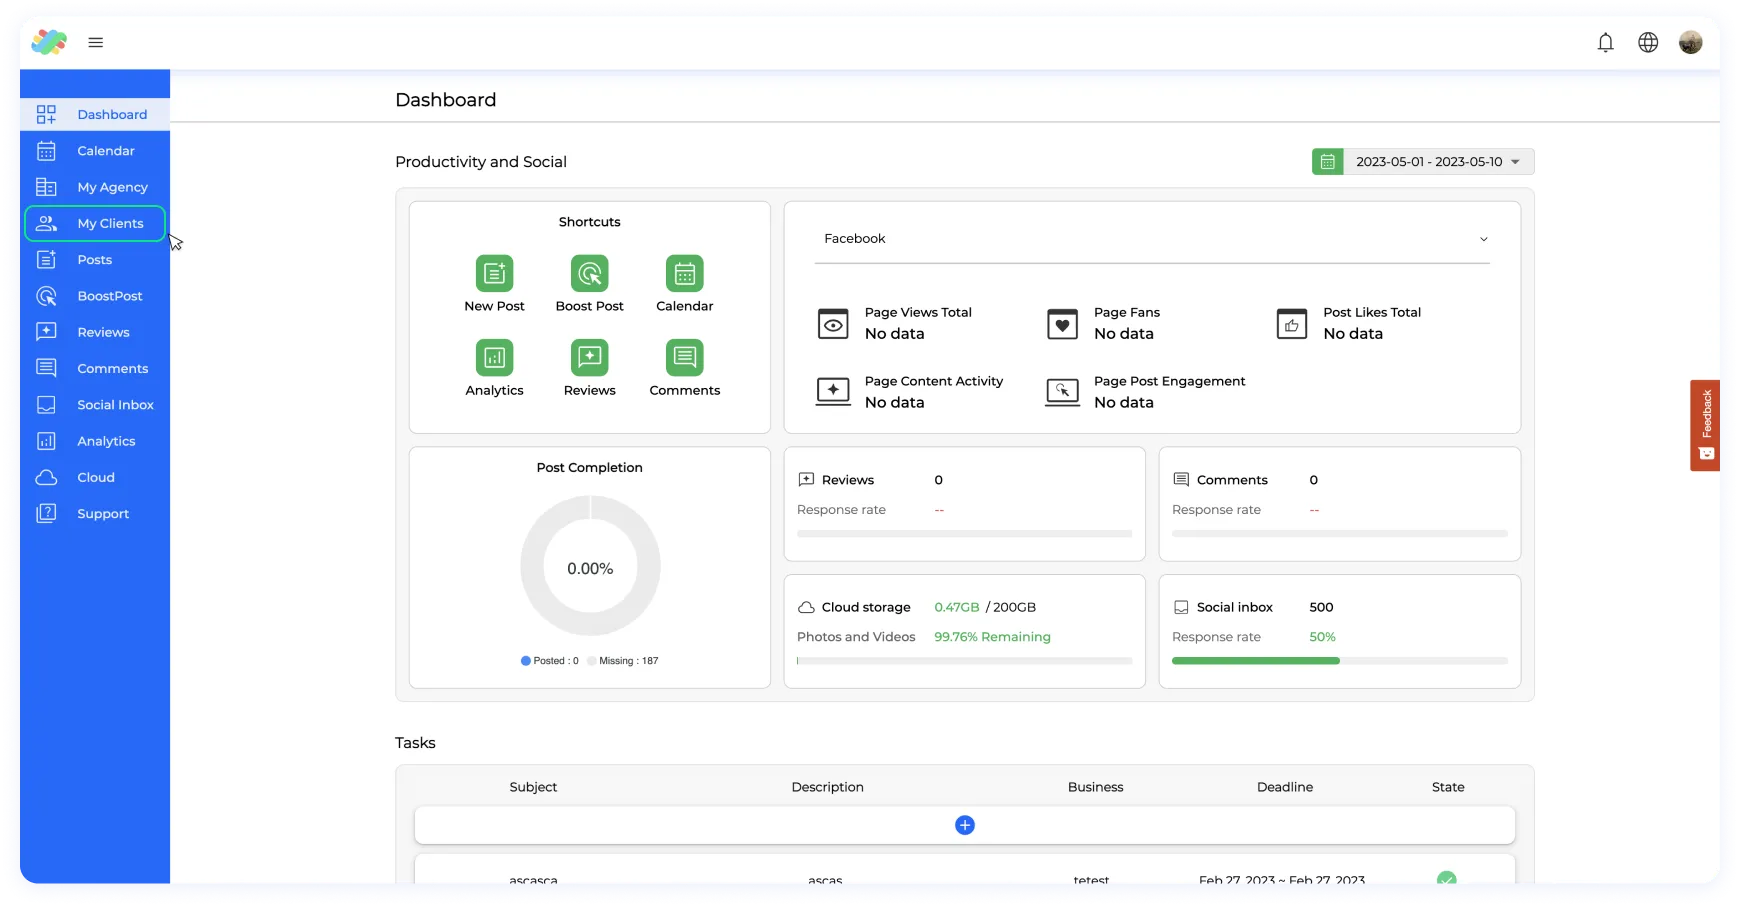
Step 1: Log in to your account and navigate to the menu on the left-hand side.
Step 2: Select “My Clients” from the menu.
Step 3: Access the business folder, and within here you will find a button labeled “Create a new business”.
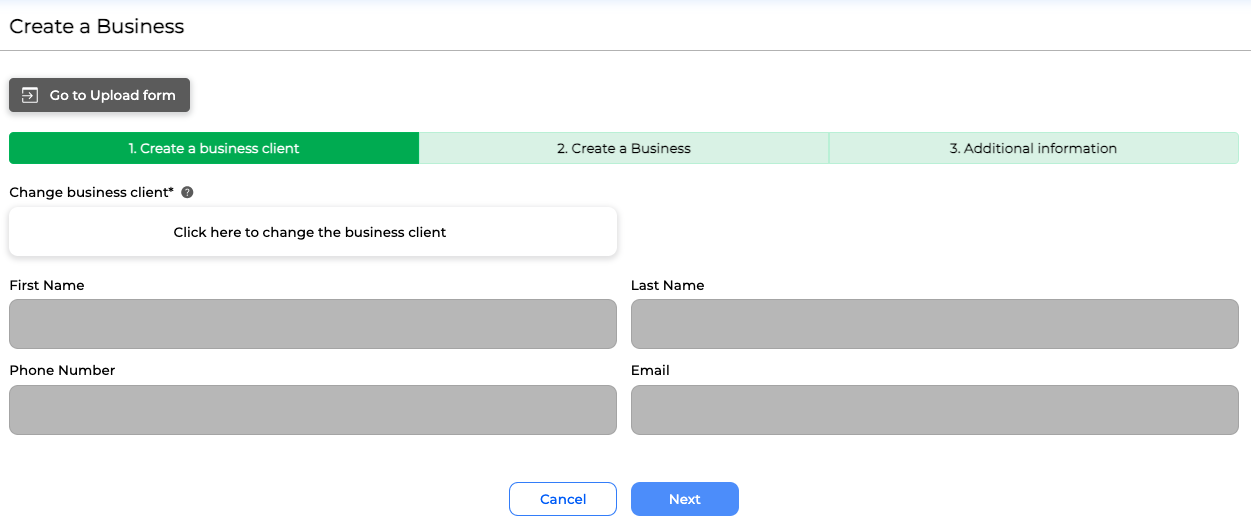
Step 4: Click on the “Create a new business” button, this will take you to the business creator which is composed of 3 sections:
The first section is the client contact section, here the user has to select or create a new client. If you need to create a new client, please follow the link “ Clients And How To Create New Ones?“. After selecting a client to be linked, click next and go to the business information tab.
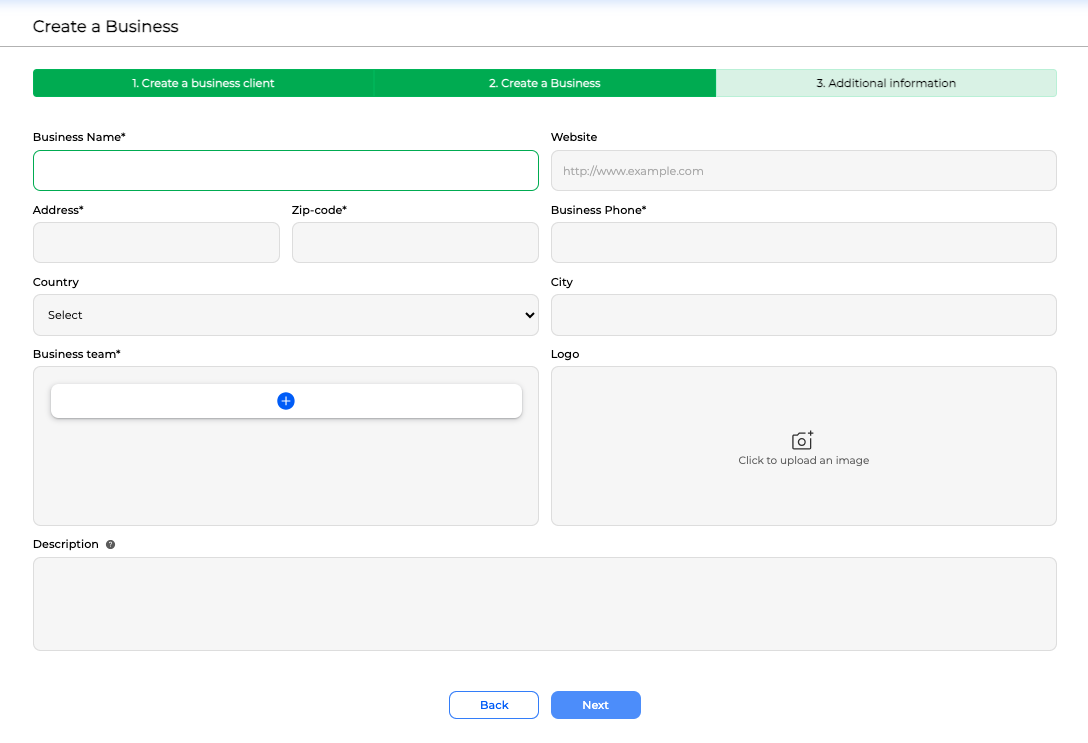
In the business information tab, the user can input the mandatory information: business name, address, zip code, business phone, and the optional information of: Website, country, state, city, logo, and description. All this information may be modifiable later.
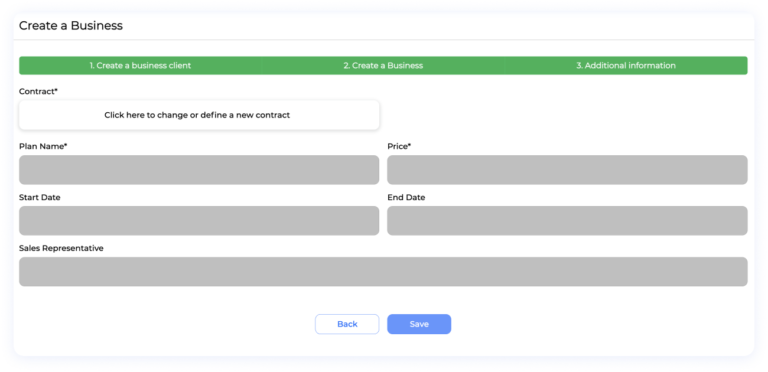
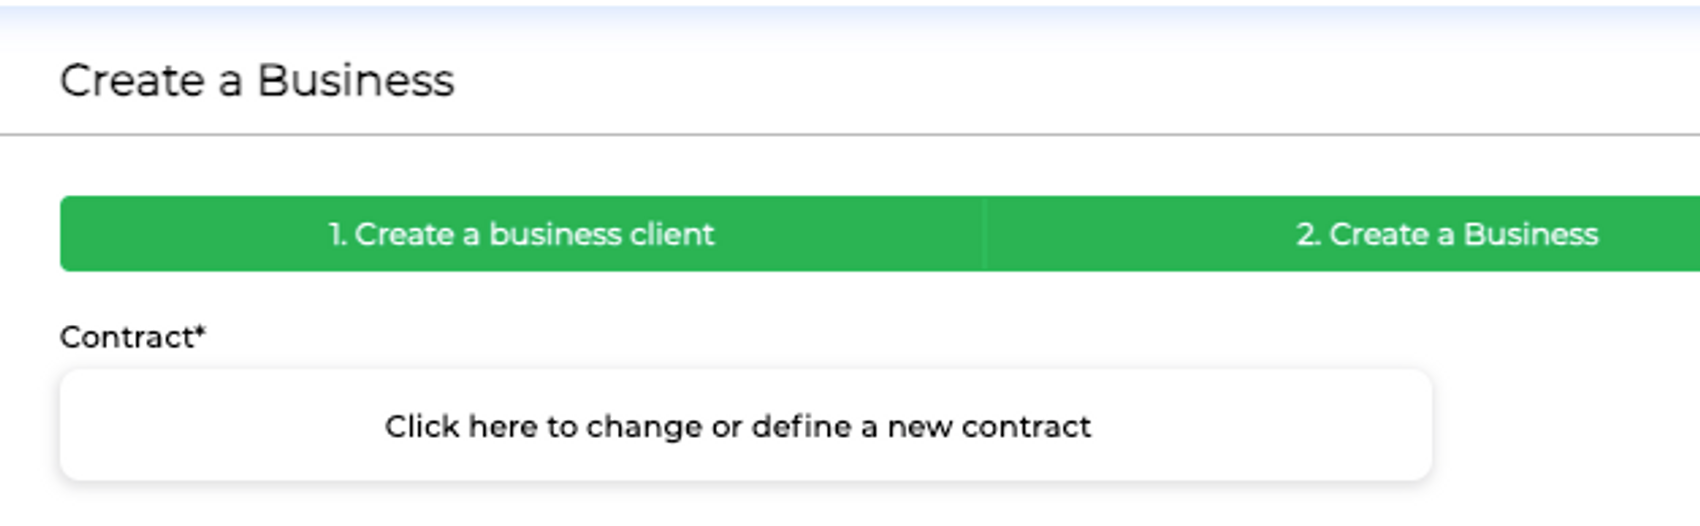
In the last stage, Additional information, the user can create or select a contract. For more information on contracts, their purpose, and how to create and use them, please follow the link “ Contract Overview And Management“.
ITo ensure the creation of a contract is a seamless process, follow these technical steps:
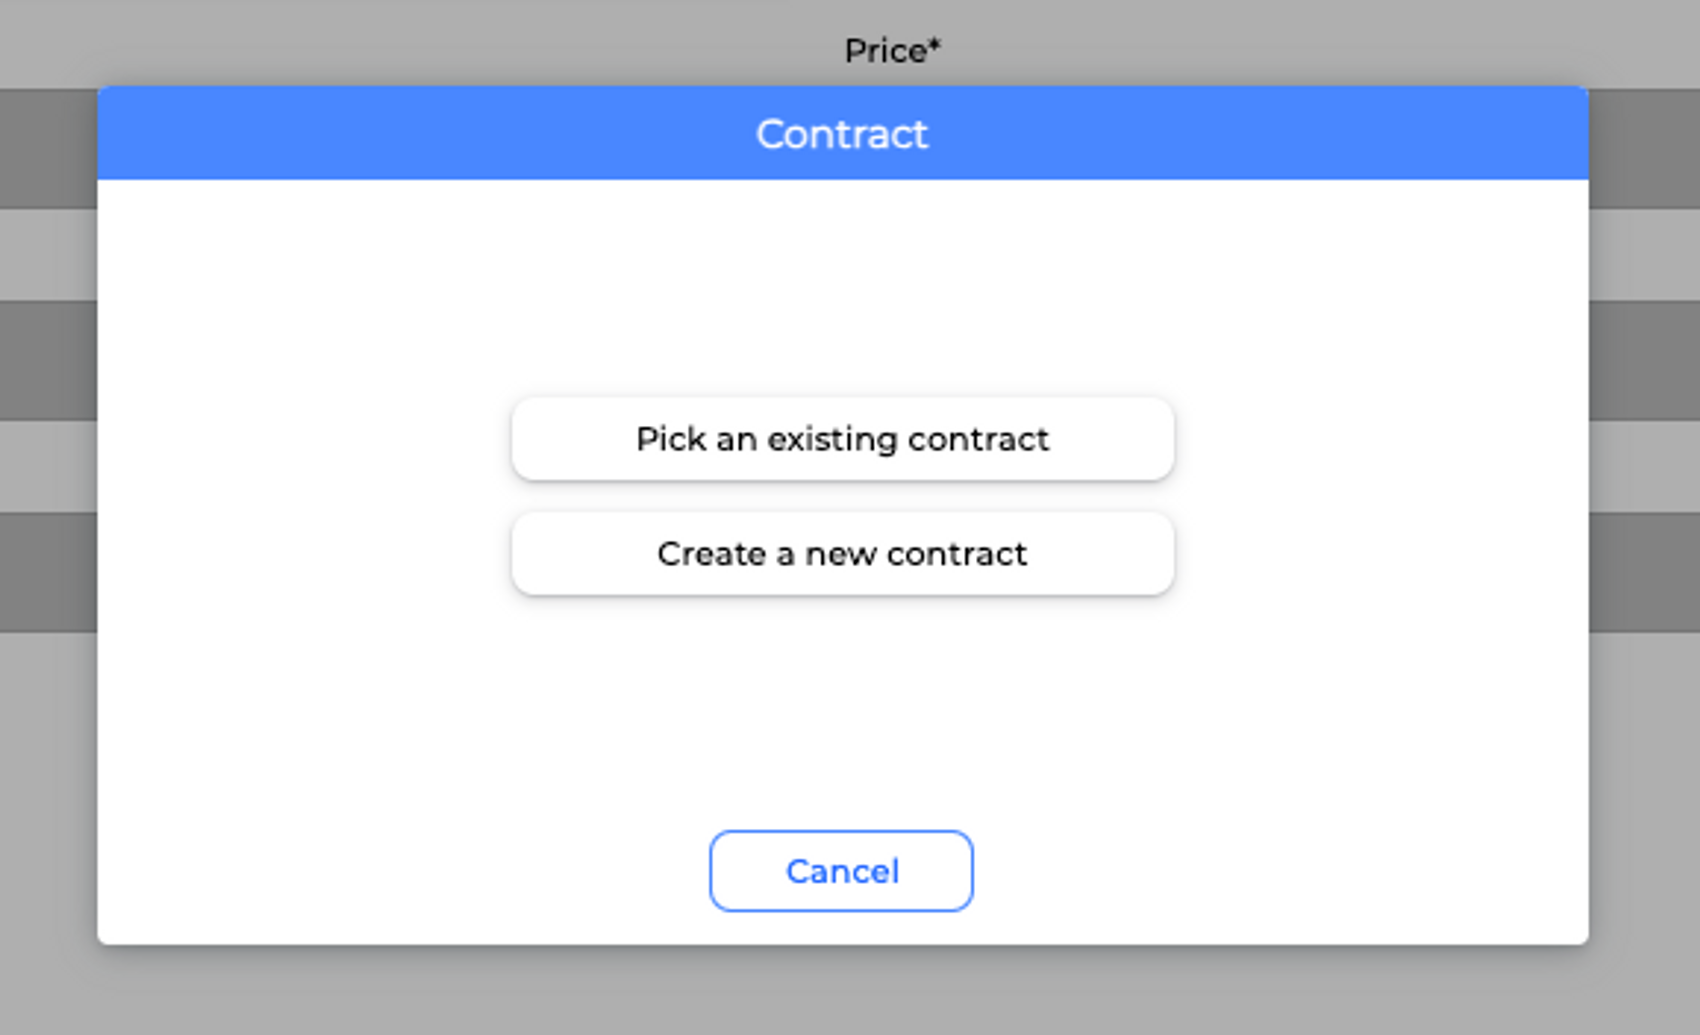
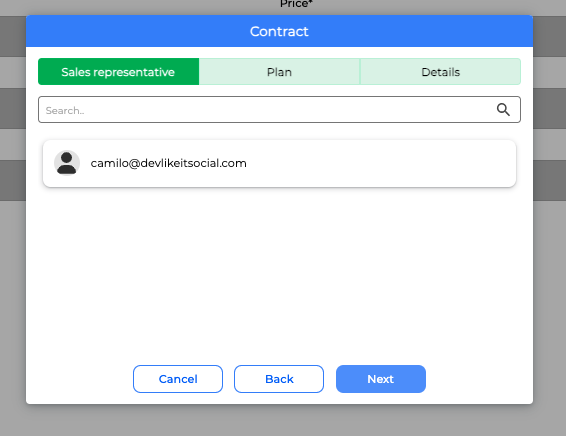
1: Initiate Contract Setup Click on the designated button to initiate the creation of a new contract.
2: Choose Contract Type For initial contract creation, opt for the “Create a new contract” option. In case you are working with an existing contract, select “Pick an existing contract.”
3: Assign Sales Representative From the available employee profiles, designate the relevant sales representative responsible for bringing in the new client. This step is pivotal to proceed.
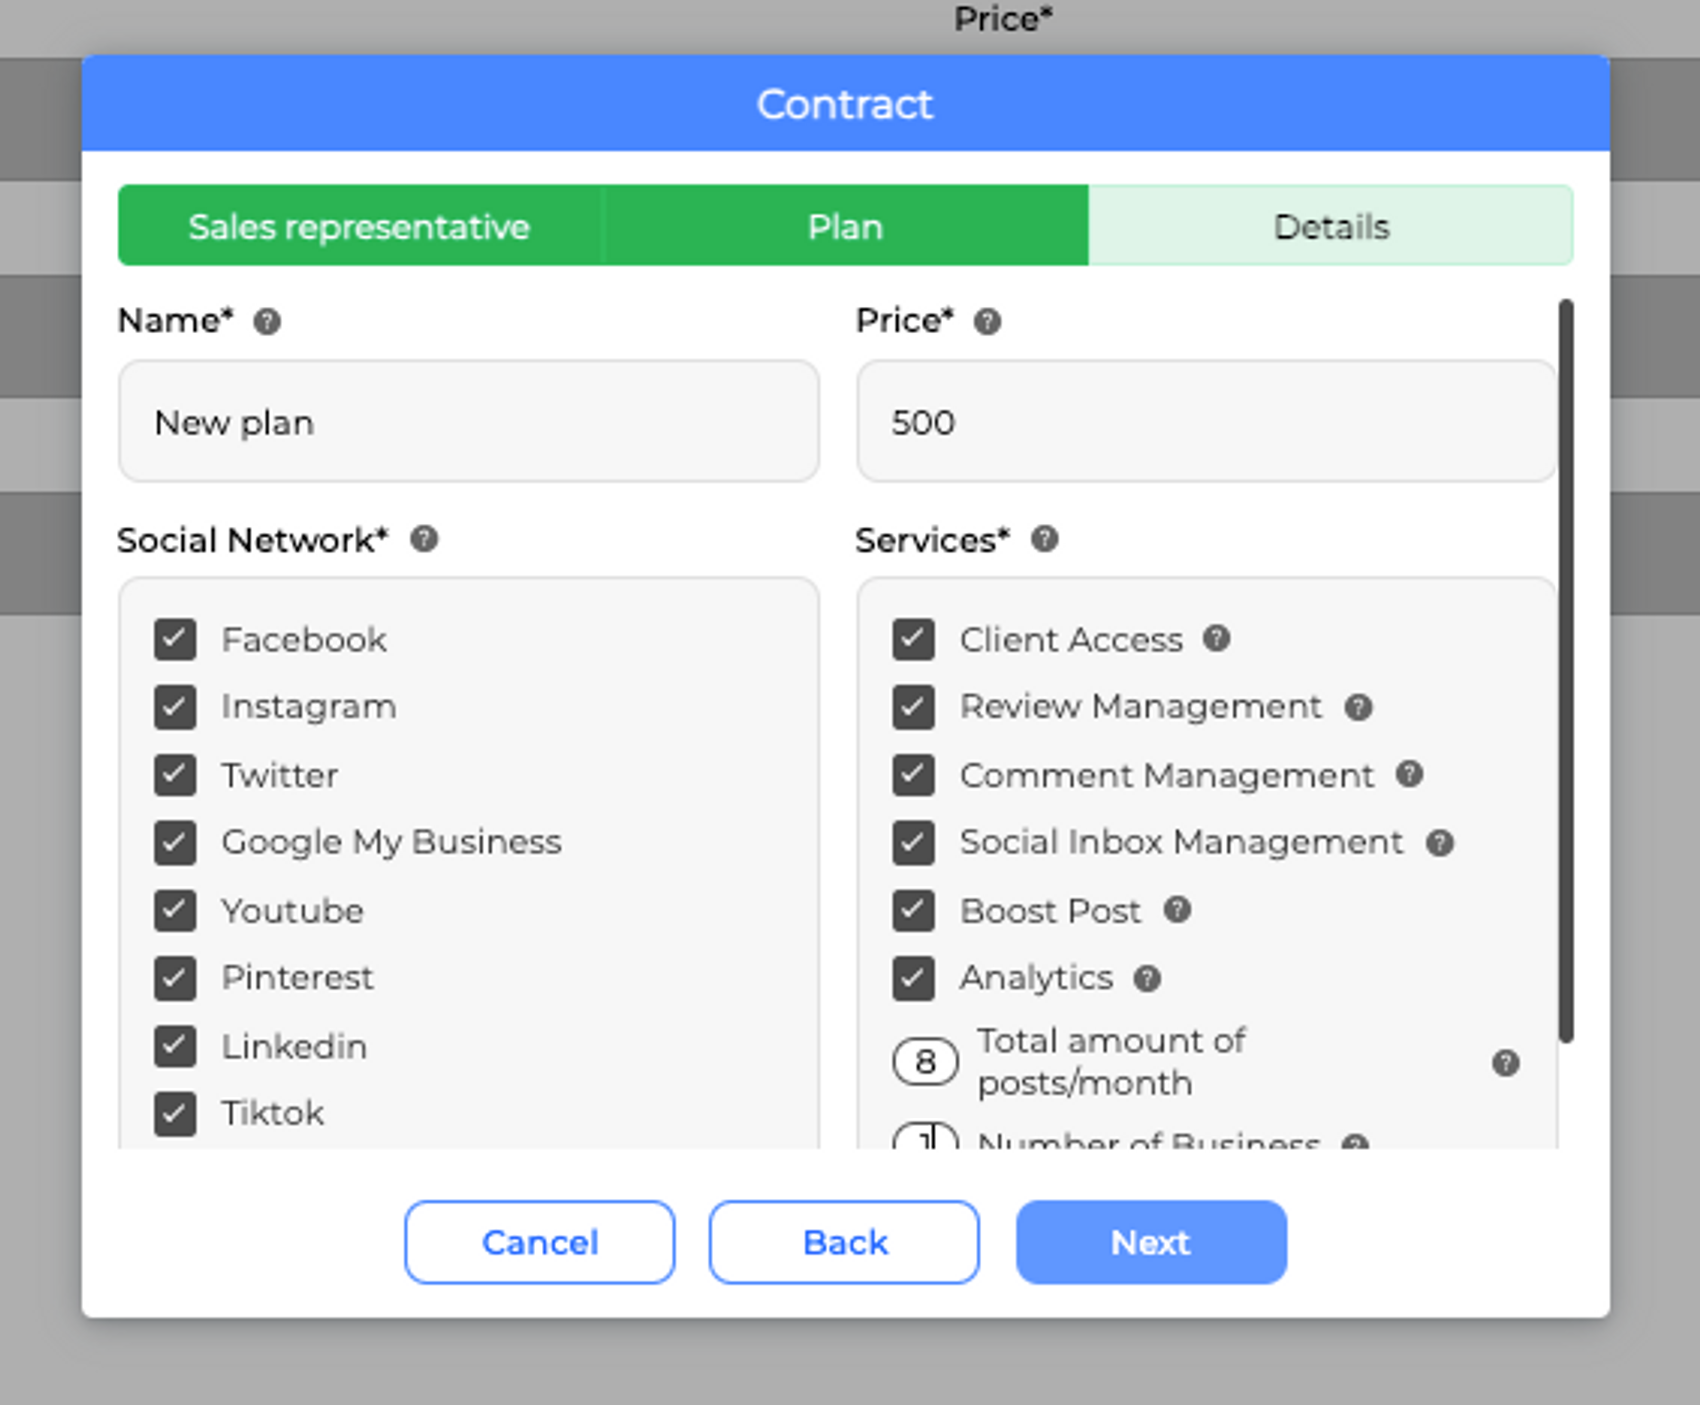
4: Define or Select Client Plan Select an existing plan or establish a new one for the client. For comprehensive details on plan options, refer to the Agency Management section, where you can find extensive information. Essentially, a plan encompasses all services encompassed within the client contract and agreement.
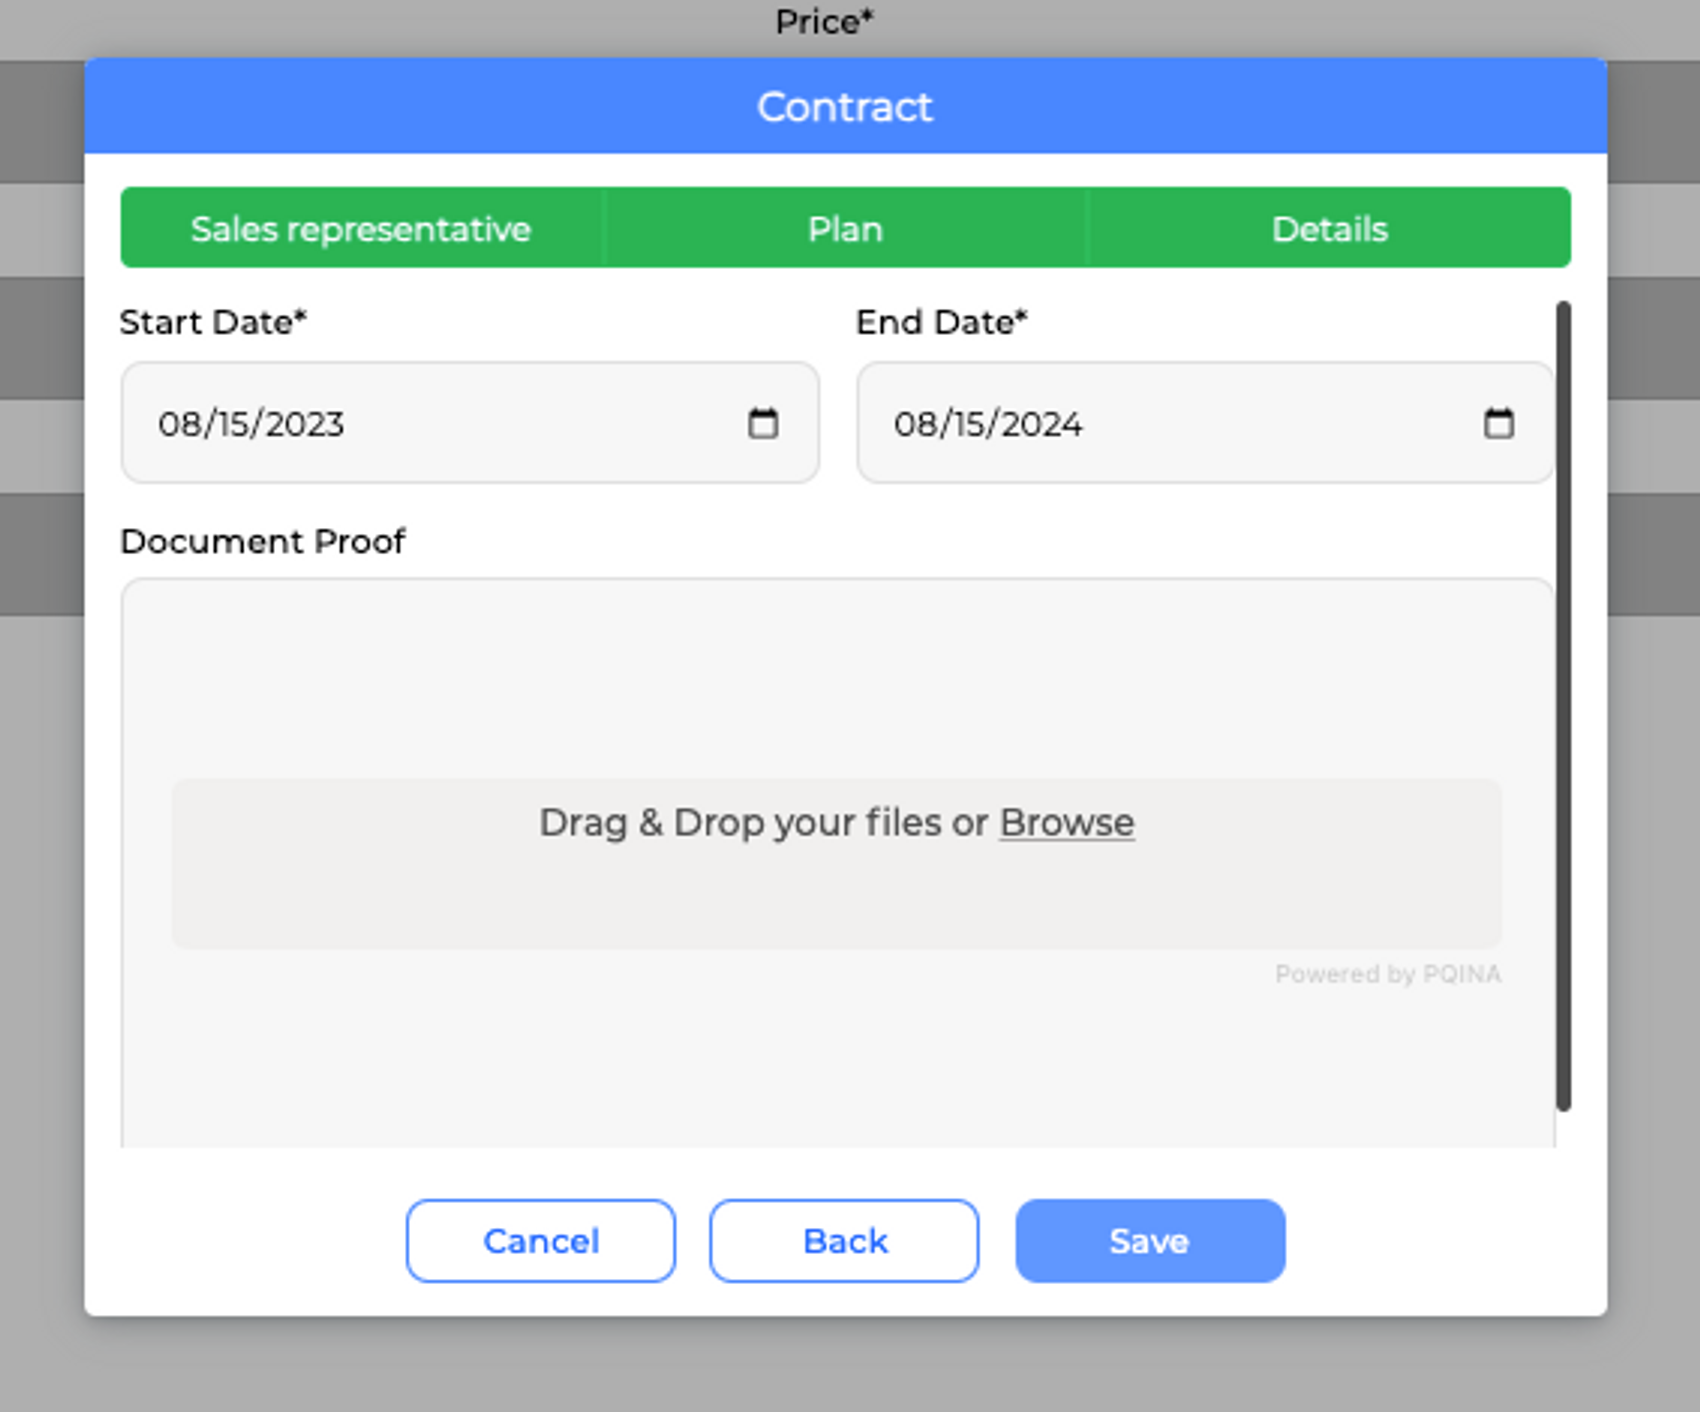
Final Step: Set Contract Duration
In this concluding phase, you’ll establish the time frame during which the contract holds validity. It’s important to note that these dates serve as the foundation for future notifications regarding contract renewals and play a pivotal role in determining the overall duration of the agreement.
Moreover, within this step, you have the flexibility to include an optional document upload feature. This allows you to attach a document, which can be a signed version of the finalized and formal agreement. This supplementary document serves as a tangible record of the agreement’s details and terms.
This contract comprises several key components: the sales representative assigned to it, the chosen plan delineating the managed social networks, included services, and the monthly fee. After furnishing all requisite information, you can input the contract’s commencement and termination dates. Additionally, there’s an option to upload official documentation, although this step remains discretionary.
Step 5: Once this information is complete, click on “Save” and the business will be created and will now appear in your business list.
It’s important to keep in mind that the client linked to the business will be the main point of contact for the business, so it’s important to select or create the appropriate client before creating the business.
Also, the plan selected for the business will define the social networks to be managed, the services to be included, and the price per month, so it’s important to select or create the appropriate plan for the business.
This website uses Cookies on this website are used to personalize content and ads, provide social media features and analyze traffic. In addition, we share information about your use of the website with our social media, advertising and web analytics partners, who may combine it with other information you have provided to them or that they have collected from your use of their services.
This website uses Cookies on this website are used to personalize content and ads, provide social media features and analyze traffic. In addition, we share information about your use of the website with our social media, advertising and web analytics partners, who may combine it with other information you have provided to them or that they have collected from your use of their services.
Necessary cookies help make a website usable by enabling basic functions like page navigation and access to secure areas of the website. The website cannot function properly without these cookies.
Preference cookies enable a website to remember information that changes the way the website behaves or looks, like your preferred language or the region that you are in.
Statistic cookies help website owners to understand how visitors interact with websites by collecting and reporting information anonymously.
Marketing cookies are used to track visitors across websites. The intention is to display ads that are relevant and engaging for the individual user and thereby more valuable for publishers and third-party advertisers.
Unclassified cookies are cookies that we are in the process of classifying, together with the providers of individual cookies.